
This part of the rod has had to wait a while until the body has welded and the internal steelwork carried out.

Dec 29 2000
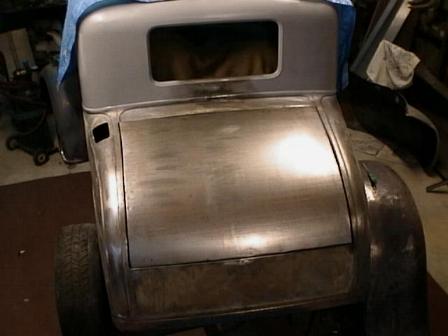
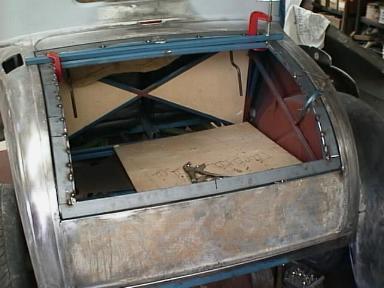
I have made a lot of progress on the trunk lid. The basic frame and skin was made some time ago but the problem of how to shape the edges of the skin eluded me for some time. What i ended up doing was adding a 3mm x 40mm steel flat to the frame shaping as I went about 5 mm smaller all round than the opening. A grinder was used to true up any irregular areas.
The skin was then carefully clamped to the frame and a 20mm edge bent over, all round, by carefully hammering the skin over the edge of the frame. A lot of distortion results on the curved edge (sides) sections and this area was shrunk using oxy/acet and a hammer and dolly while hot. Only about 50mm at a time was shrunk.
The result so far is very pleasing for me, and sure beats that big hole in the back !
A little careful dolly work around the edges will see the skin ready for fitting to the frame.
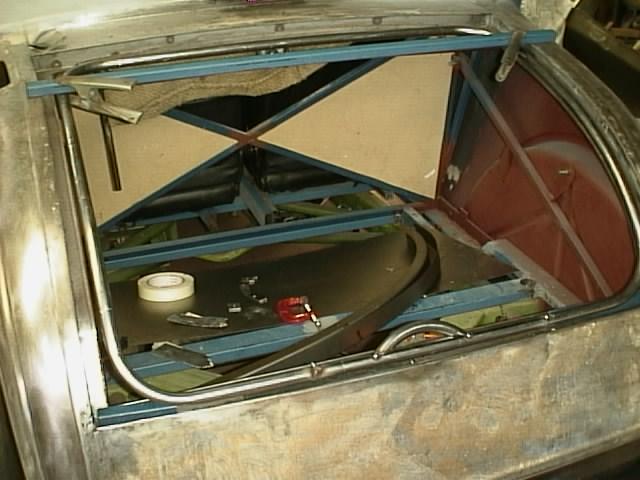
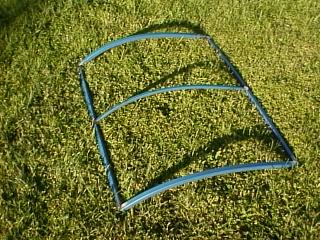
Here is the final, round tube, frame under construction. It was made in four pieces.
A central vertical tube will be added later as the skin is fitted, to maintain the crown.
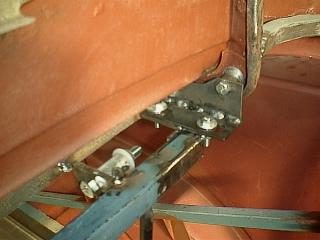
The trunk latch is from a small Mazda car and was slightly modified by adding a arm to enable a remote cable release.
Details soon.
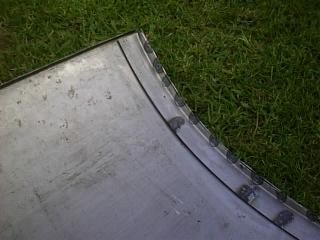
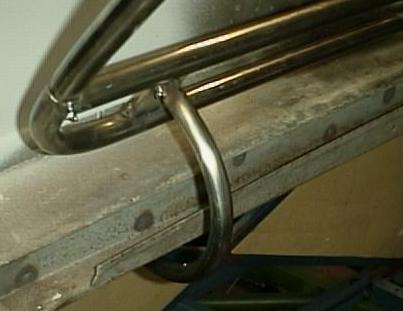
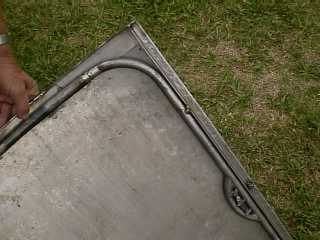
Jan 2001 This is the inside edge of the new trunk lid. This pic. shows the side of the panel which has had a 15mm edge turned over at 90 degrees, then an internal right angled piece has been welded to the edge also. This is repeated for both sides. The wider section has been split in 3 places then welded again to allow it to fit the slight curve of the trunk edge. The three dark spots are where the splits have been welded up. The other darks spots are where the strip has been welded to the edge of the trunk lid.
To be honest, this has taken much longer than i thought and is probably the hardest part (after the sunroof) of the car I have tackled so far. It can be done, but is a lot of work.
The wider section will be welded to the tube frame later, to secure the skin. Before welding, I might prime the inside area first to reduce possible rust problems.
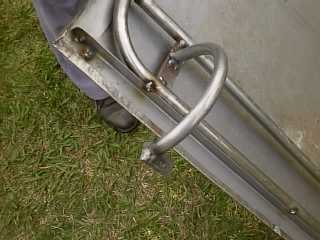
On the right you can see the front edge has had a right angled piece inserted and the edge folded over it.
The inserted piece has been curved to match the front edge body opening. A similar piece was inserted at the rear edge also as in left hand picture. These pieces stiffen the edges considerably.
The internal pieces fitted on the sides (pic. above) were MIG welded to the tube frame. The angle pieces were also MIG welded to the frame.