TrxAVR
Page last updated on July 20, 2009 PCB panel to be made in group buy Order for PCB about to be placed !
NEW 14th July 2009 Build information for this panel here.
TrxAVR is an alternative controller to Picnmix.
Picnmix is part of the PICASTAR multi band HF transceiver designed by G3XJP.
TrxAVR allows a number of different displays to be used, including graphical types on a PICaSTAR.
Prepare to be AMAZED !
The TrxAVR PCB by Ian, G3VPX, is included on this ComboSTAR panel of PCB's and provides an alternative display and user interface to PICNMIX for the PICASTAR radio.
Click here for Ian's pages. (Come back here though !)
NEW 9th June 2009 Schematics of the TrxAVR-b PCB with component overlays.
The display can take several forms, multi line character based LCD modules or full graphics LCD with or without a touch screen.
Combo PICASTAR PCB has been designed to allow the TrxAVR pcb to simply be plugged in, in place of the Picnmix board. For PICaSTAR, some wiring will be required.
TrxAVR PCB integration to Combo PICASTAR
NEW 9th June 2009 Integration drawing.
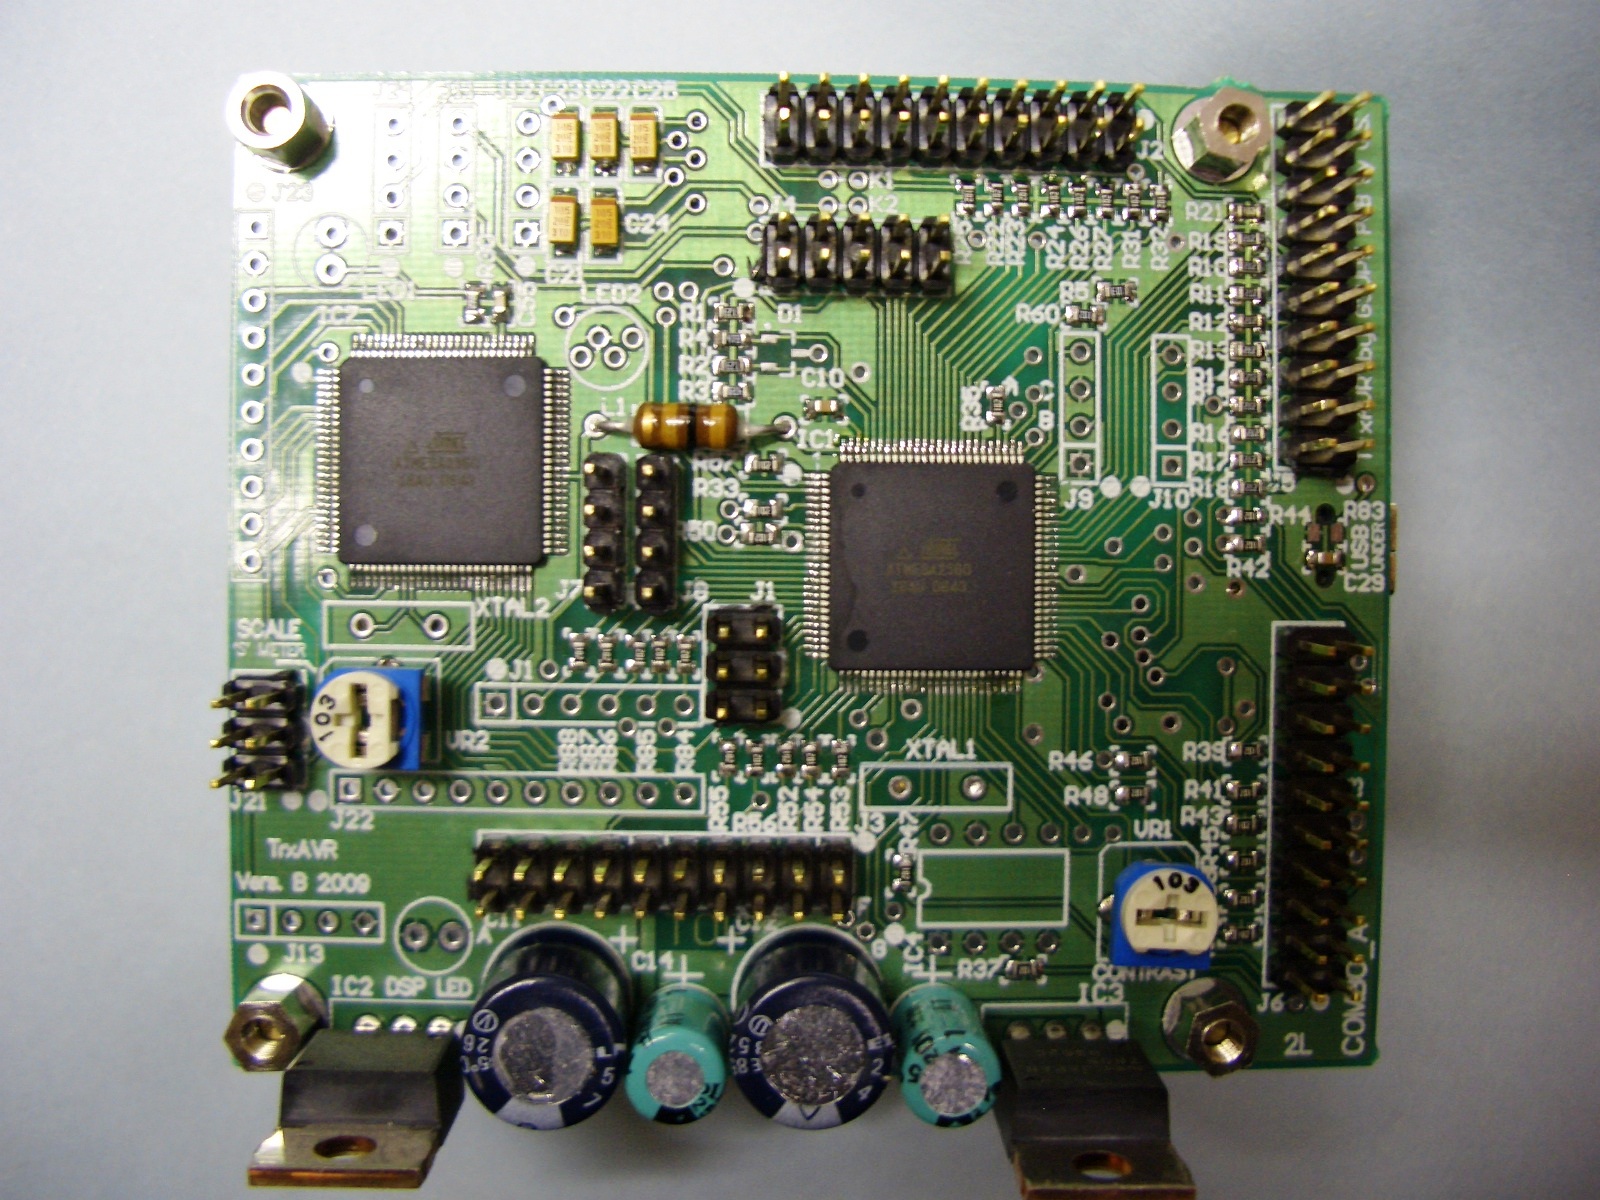
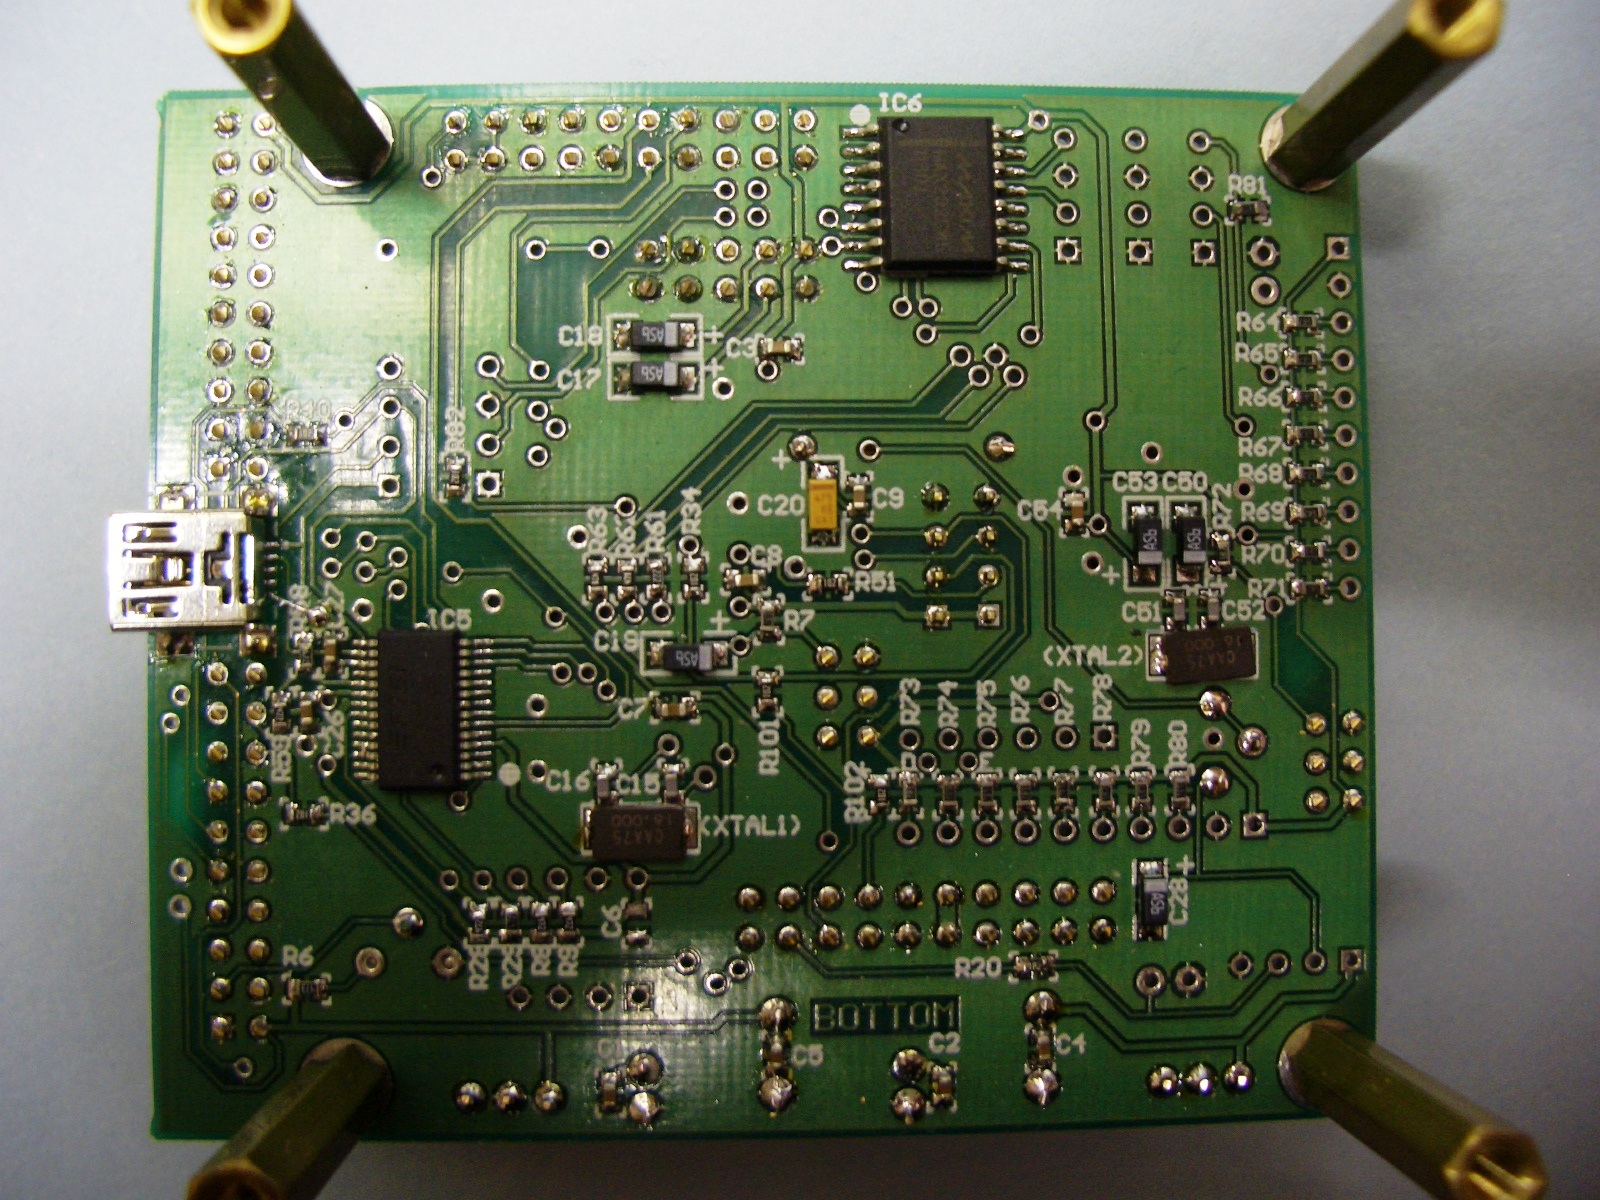
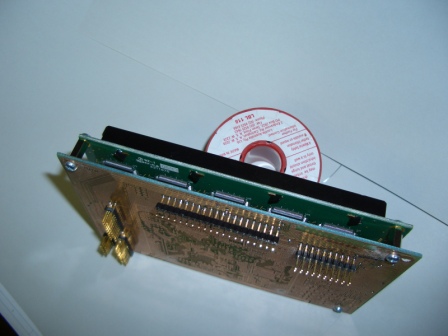
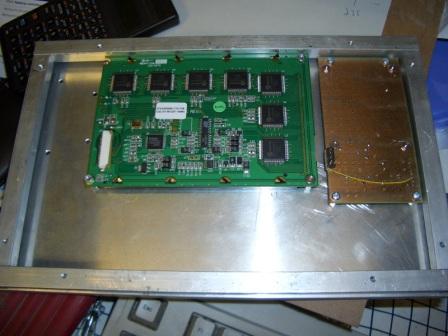
Below is the TxAVR-"B" PCB, top and bottom views. "B" is this commercially made PCB which was designed by Chris Stake. (Prototype only at present) There is also an "A" version which can be home etched, on Ian's webpages.
I now have a PCB integrating the TrxAVR-B into a PCB panel which includes the keypads and display interfacing. If you are interested in this, please email me and I will add you to the list.
Order for PCB about to be placed !
Cost is AUS$42.83 incl. postage.
The alternative is home-brew PCB's as per Ian's web pages.
Click pictures for larger view.
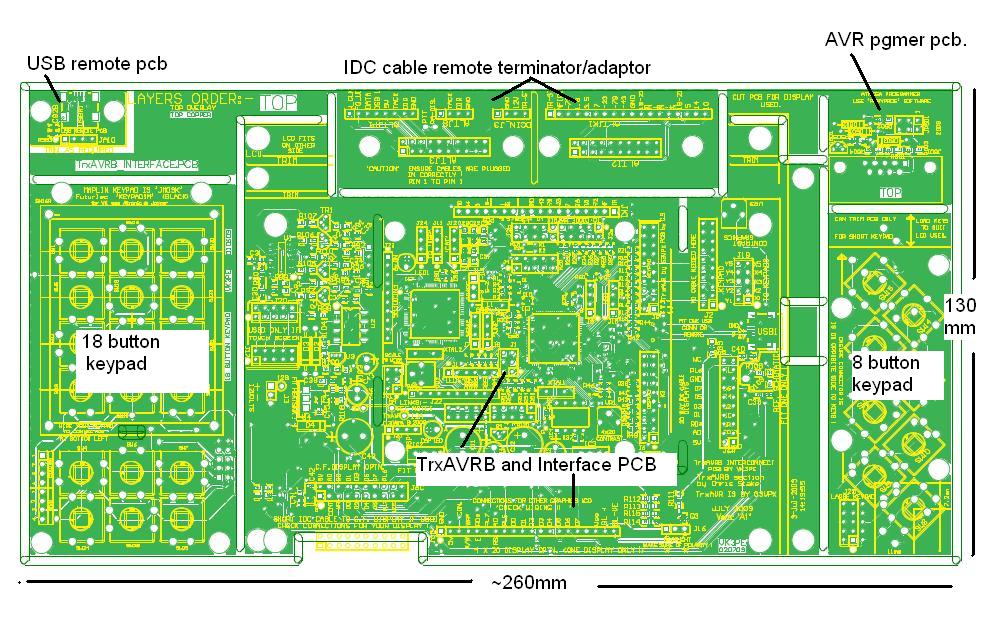
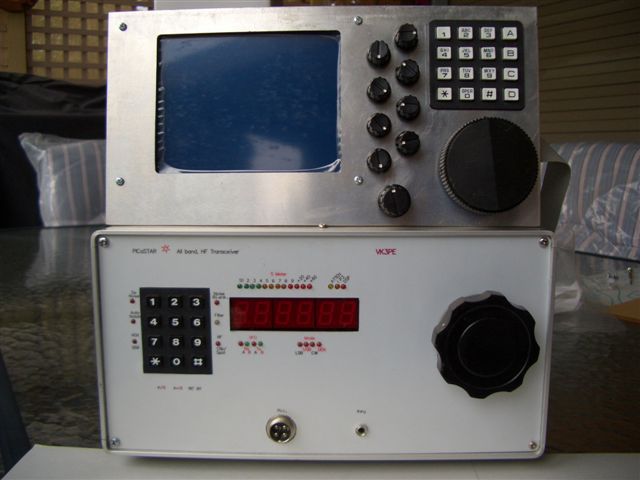
Below is the TrxAVRB interface panel.
It incorporates the TrxAVRB PCB above and all of the other PCB's for a complete build of this project.
I am about to get a small QTY made. If you are interested in this group buy, please email me asap.
Cost is projected to be AUS$38.09 plus AUS$8.94 postage for non Australian buyers. Total = AUS$47.03
Click for larger view.
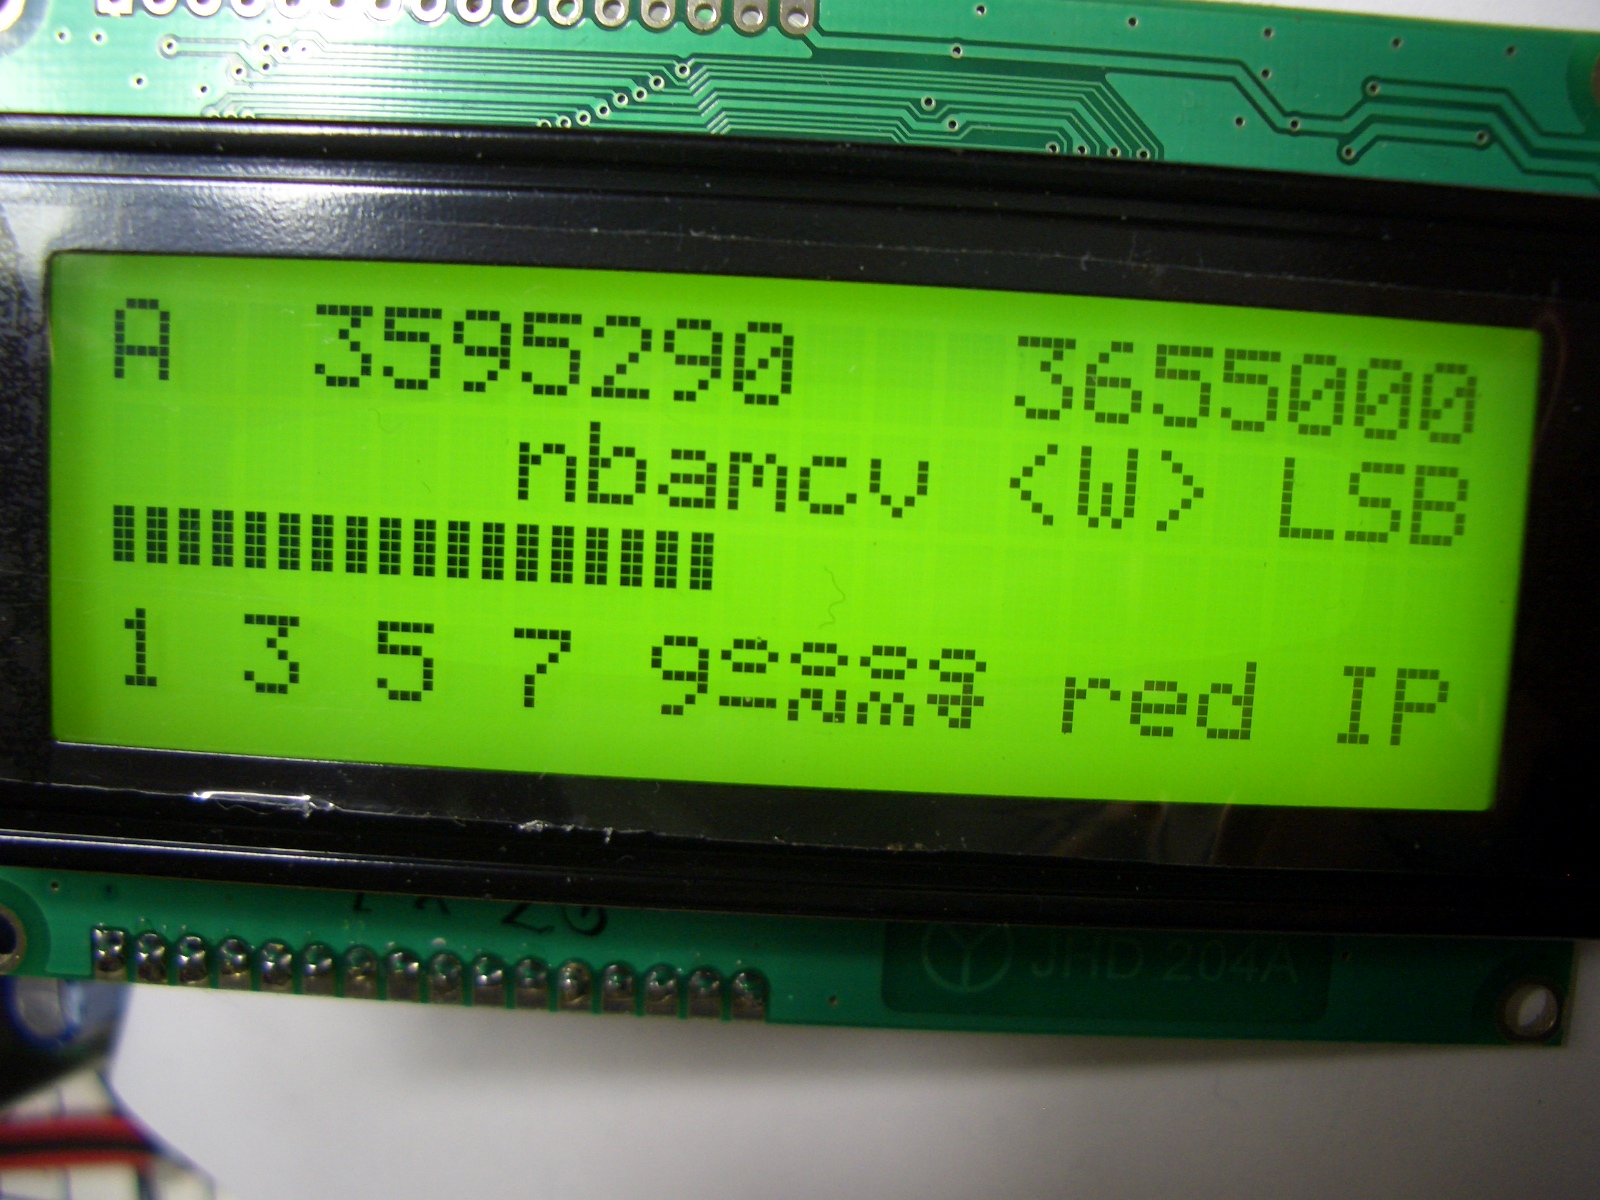
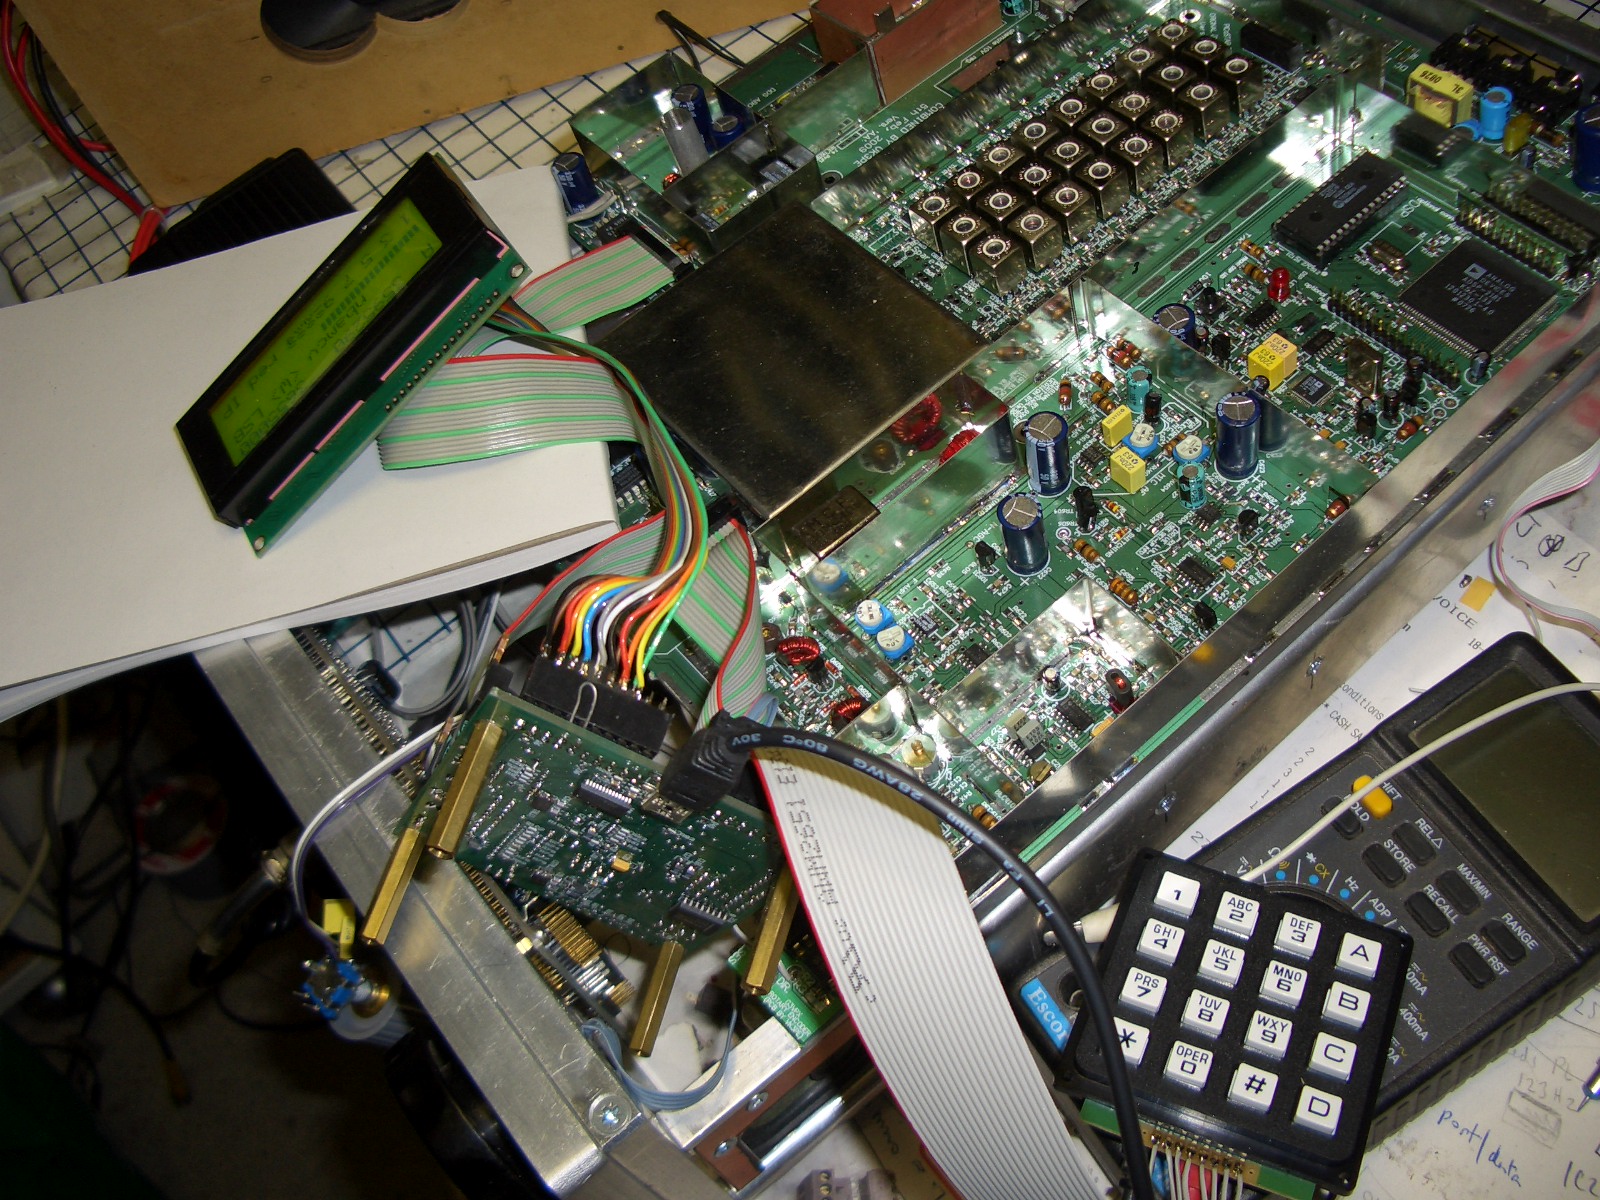
This is only one display that can be used. A cheap 4 x 20 LCD module. Typically under US$20 on eBay.
These pictures show the very temporary integration of the 4x20 LCD above, into the VK3PE Combo PICASTAR. Although it looks messy here, the TrxAVR-B pcb simply plugs into the existing IDC cables of the radio. I will make a new front panel and properly integrate the display and PCB and show it later but in my haste to see something working, I am showing it now !

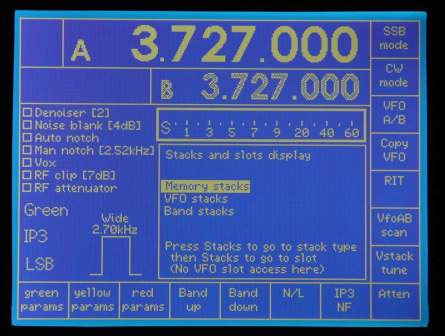
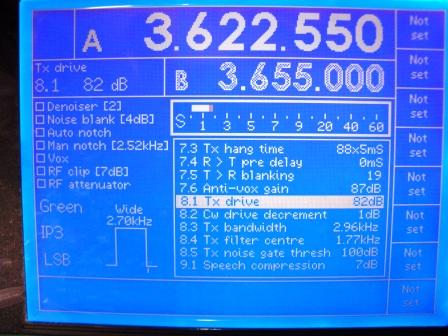
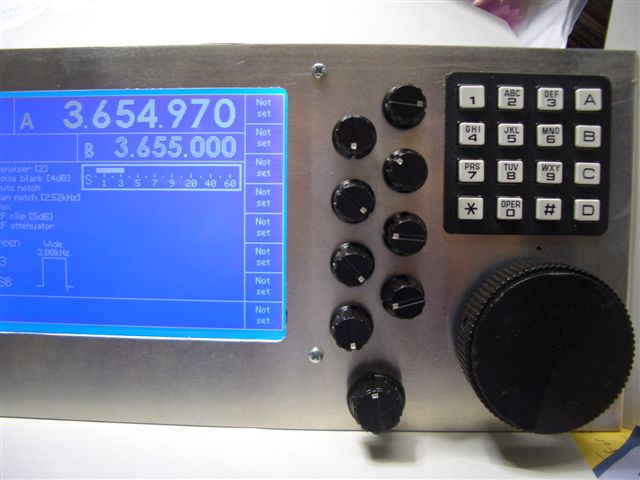
There is also a very nice graphics display that can be used. Several types (and background colours) have been identified, some even with touch screen which Ian has implemented for various functions, simply by touching the screen. Very clever indeed and adds a new dimension to PICASTAR. Even full colour may be possible but not as yet.
Click for larger pictures !
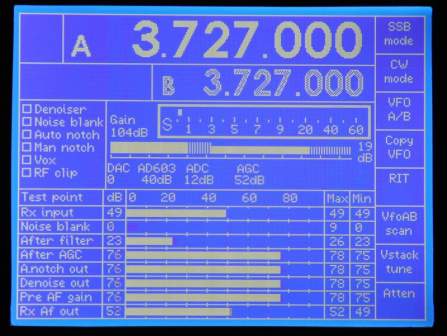
These are just two possible screen modes. Notice how the monitoring in the right hand picture can replace a PC and the touch screen "buttons" on the right and bottom of the screen. (left)
Touch screen is optional and depends on the type of screen purchased. Cost is a factor here also.
(these pictures don't do the screen justice)
Once I have a display, I will show that also but you can see more on Ian's web pages.
See one here:- http://www.crystalfontz.com/product/CFAG320240CX-TFH-TTS
This one is approx. 148 x 120mm with a viewing area of 115 x 86mm and has a touch screen and is approx US$122.
 (CFAG320240CX-TFH-TTS
touch screen type)
(CFAG320240CX-TFH-TTS
touch screen type)
(all pictures not to scale)
A slightly smaller type but without touch screen is also available. The Crystalfontz type CFAG320240K-YYH-TZ which I have is approx. US$110.00 and is a yellow backlight type and is 142 x 96 mm overall with a viewing area of ~96 x 72mm. There are identical types with blue or black backlighting also usable. Cost is similar.
Crystalfontz only ship outside of the USA by Fedex so this adds signicantly to the cost.
NOTE: the displays above use an Epson S1D13700 controller.
Other types are under investigation:-
One type on eBay at around US$79 or less (incl. shipping) looks promising and is being investigated.
June 25th: This display has now been received and works great ! See below. Picture is poor due to location of the test setup and camera available but in reality, looks excellent.
The vendor is "sureelectronics4" and has two versions of this display. The one that has a row of connector holes down the left side is the one to get. Do NOT get the one with the ribbon cable on the rear. The vendor also supplies a little PCB for testing the panel when you get it. It is not needed in TrxAVR.
Search eBay for "320240 graphics"
eg this one:- you can make an offer. (US$75 WILL be accepted)
This is a 5.7" diagonal type and is NOT touch screen.
If you want more info. on this display, please email me for details. VK3PE (www.qrz.com for email)
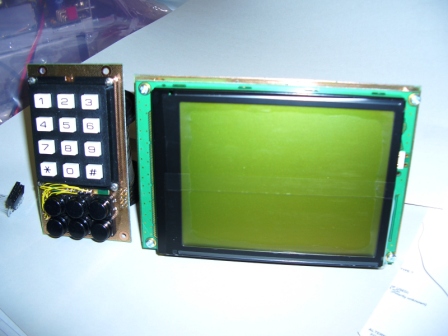
June 2009: In preparation for my graphics screen, when it arrives, a keypad has been made using a home etched PCB based on Ian's layout. This keypad is called the '18 key board'. Overall height is about the same as the display. Instead of the 3x4 keypad on top, the PCB can also be fitted with the same switch type as the bottom ones.

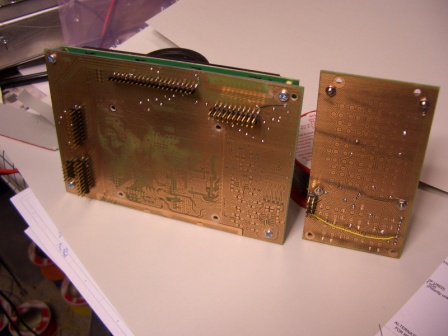
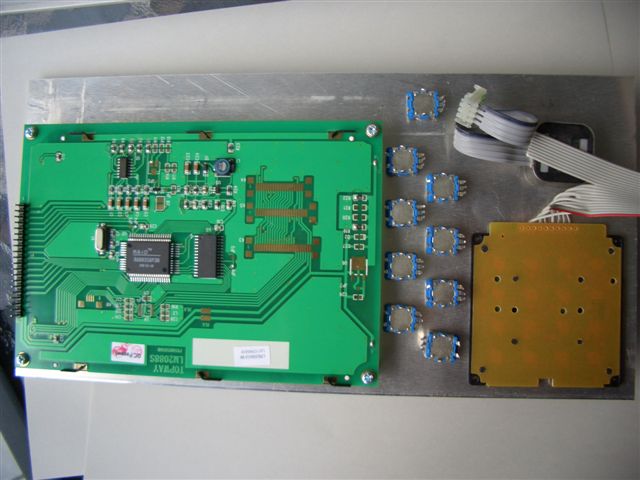
June 19th: Shown below are the proto PCB's for the TrxAVRB interface. This allows connection of the CFAG320240K-YYH-TZ graphics displays and the eBay one we have found and are about to test. The larger PCB actually incorporates the small TrxAVRB PCB shown above into the interface in the central area. The various IDC headers allow connection to the displays. In actual use, only the header required for the display being used, would be fitted.
There is also a smaller PCB for a right side keypad if required. (see further down page) It would be part of the pcb panel.
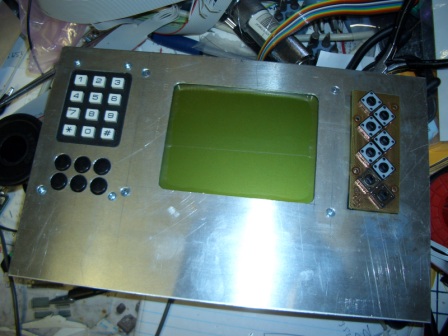
The pictures below show my new front panel for a re-housed Combo STAR. The right hand pictue shows the optional 8 button keypad which of course, will be mounted behind the panel and fitted with key tops like the left hand lower keypad.
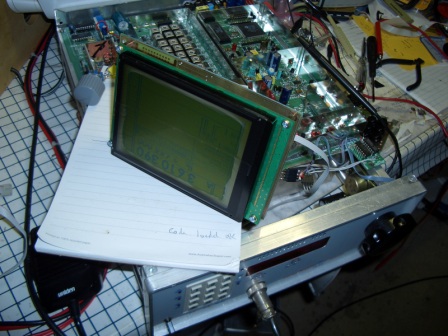
21st June, 2009. My display is WORKING ! A bit misleading as backlighting not connected in the picture. My display has a yellow backlight.
It's shown here running my Combo STAR. Since the display is much larger than the 7 segment display, I am making a new panel and will mount the radio into a new case I have.
I will take some better pictures soon. The right hand pictures shows a dummy setup of all possible controls, with RH keys removed. (sorry about flash)
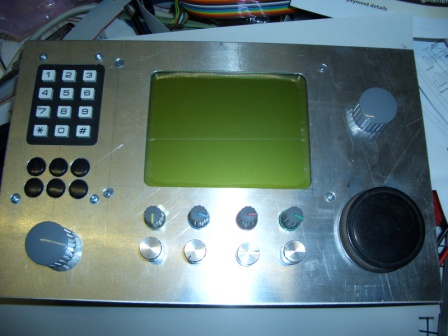
To cater for the additional controls, I am re-making the Combo case. The front panel is now taller than before. This means I have to rework the remainder of the case also. Constrcution of front panel is from extrusions, screwed togehter, as before. Not all holes ave been drilled.
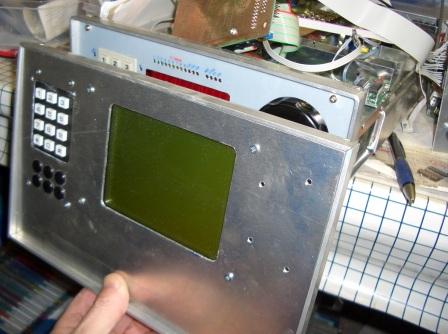
1st July, 2009: For my STAR #1, this is the eBay graphics panel, ready to be fitted to the radio.
This panel uses 8 encoders from eBay which also have a press button switch function. ie. pressing the encoder knob makes a switch contact also. This reduces the clutter on the panel as the encoders also function as the right hand keypad.
The encoders are aligned with the soft keys on the right side of the display. (not set areas)
There are many permuations of TrxAVR. The builder can decide on what he wants.
The simplest is a 4x4 keypad and Menu encoder only. The most complex is 4x4 or 16 keypad PCB plus 8 encoders and also a RH 8 key pad. Using the combined encoders, allows the most complex arrangement, but with reduced panel space.
The encoders are available in lots of 10 from "Sureelectronics4" also. They come with "free" grey knobs which are way too big.
The bottom encoder (slightly larger knob) is the MENU encoder for TrxAVR.
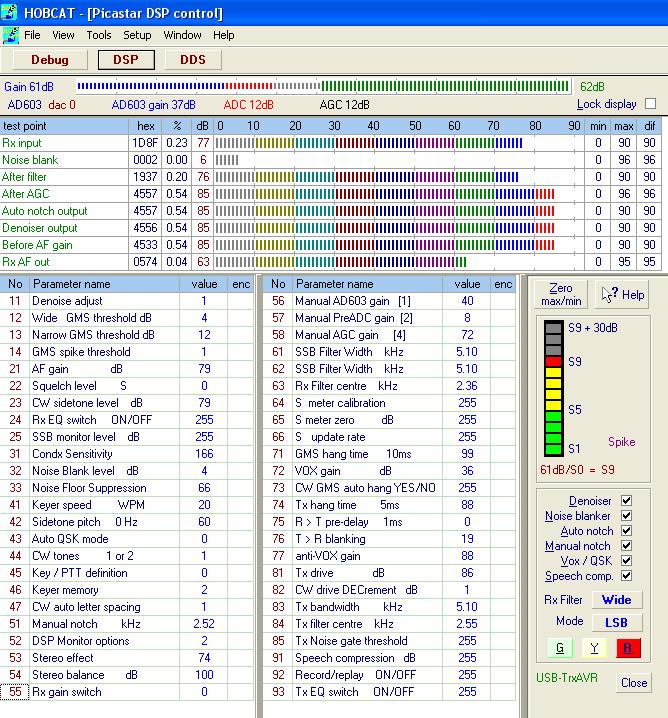
Ian provides a very neat installation program, called Hobcat, which allows cutomisation of your front panel. You can have a number of controls on the front panel for instant access to various DSP commands if you wish. Plus Volume control too.
Hobcat also downloads the software to your PICASTAR, with TrxAVR interface. This replaces Qbasic setup.
NOTE: to use Hobcat on the Combo PICaSTAR,
the rear serial (DB9) connector MUST have pins 2 and 3 linked. Use a 1k resistor.
Ian has put an incredible amount of work into this. CAT interface is being added also.
Click for larger version of this screen dump from my Combo PICASTAR.
Under Construction !
Click here for Ian's pages. (Come back here though !)
BACK to my PICASTAR information.
Page created by vk3pe on 25th may, 2009